
That old camcorder you haven’t touched in a decade or two probably contains some files you want to save. The pre-Smartphone era of home video recording offered a dizzying variety of camcorders. There were so many different formats, cords and cards. This makes for an equally dizzying number of ways to transfer files from camcorders to computers. So while there are no simple instructions on how to do this across the board, we can at least lay out the basics of where to start.
Here are some of the most common camcorder formats from 10-20 years ago and how to begin preparing to retrieve the files they contain.
Preparing to transfer files
Gather everything you have that goes with the camera, including the power cord. If you can’t find the power cord, you will need to buy one that fits your specific camcorder. This will be the best way to power the camcorder since any batteries you have won’t likely have enough charge. Look on the side of the camcorder for the model number. Then search for a power cord with that number on sites like ebay.com or amazon.com.
Camcorder formats
Camcorders with internal hard drives (HDD)
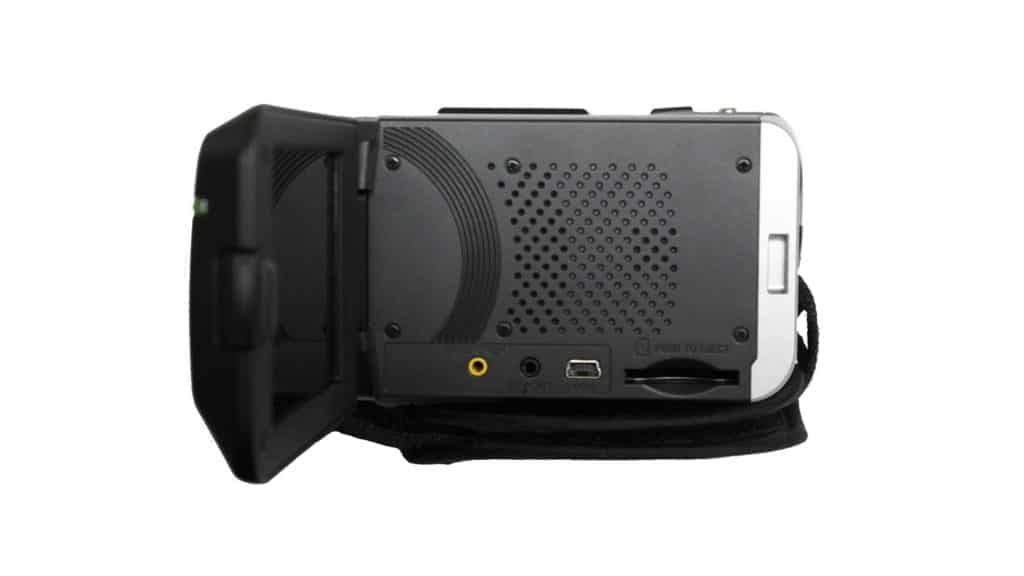
A camera with “HDD” in the name stands for “hard disc drive” and records to an internal hard drive. To get the files off you will need a specific USB cord. One end must be the exact size of the camera’s port (likely mini-B) and the other end should be the common type A USB size to plug into the computer.
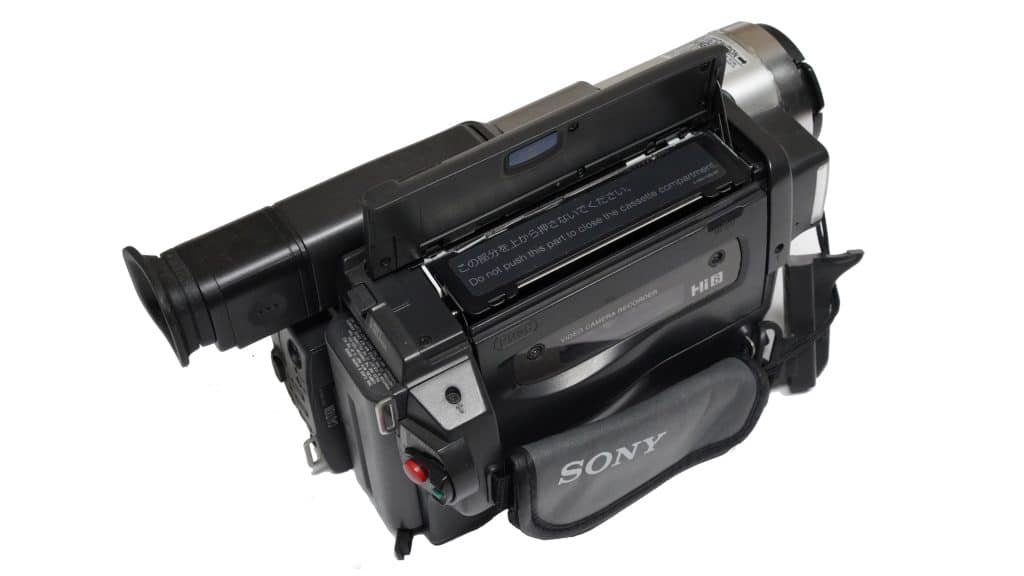
Camcorders with tapes
Camcorders with mini DV, Digital 8, Hi8, or 8 mm in the name record to a tape. The camcorder will need power to eject any tape that might still be inside. If the tape is jammed in the camcorder, it is still possible to get it out (though damage to the camera in the process is possible). Once the tape is removed, the tape can be digitized without needing the camcorder that was used to record on it or any cords.
Camcorders with DVD recording
A camcorder with DVD in the name records to a mini DVD disc. You can take off videos burned to the disc using a USB cord going from the camcorder to a computer. However, you must first finalize the disc. To do this the camera must have power so you can navigate through the menus. Select “finalize disc” to allow the camera to complete the finalizing process. In other words, you won’t have success by just removing the disc and putting it in a disc drive.
As with other camcorders, make sure you have a USB cord that fits the USB port of the camera on one end and the computer’s port on the other end. Again, this is likely a cord with mini B on one end and type A on the other.
A DVD camcorder with “hybrid” in the label records to DVD as well as a removable media card. In this case it’s good to check for any files on the card that aren’t on the DVD, as well. You can also transfer files from the card using a USB cord.
Camcorders with cards
If your camera records exclusively to a removable media card (such as an SD card or Sony’s Memory Stick), you can access the files a couple ways. Either transfer via USB like with the other camcorder formats or remove the card and use a card reader plugged directly in a computer. Keep in mind there are a variety of card formats and sizes. Make a note of what kind of card you have to determine the best way to retrieve the files.
It’s not really as complicated as it might seem at first to transfer files from camcorders. Once you gather your cords and understand the format and USB ports of your camcorder, you’ll be well on your way to rescuing your priceless videos and photos from the early 2000s.
